

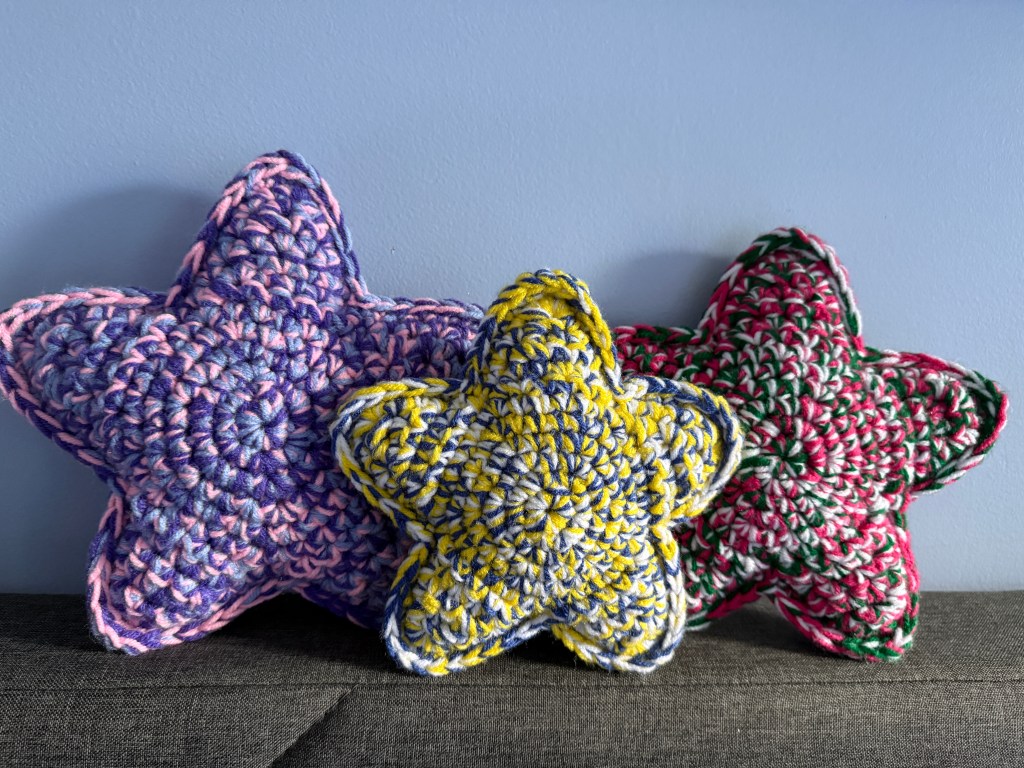
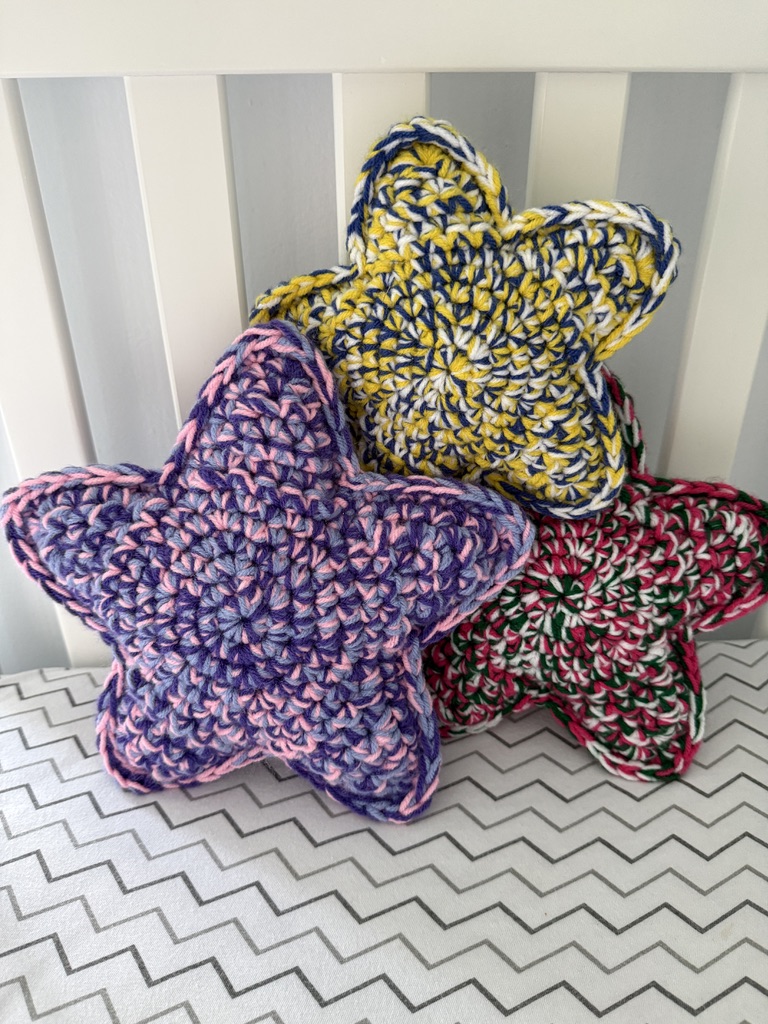
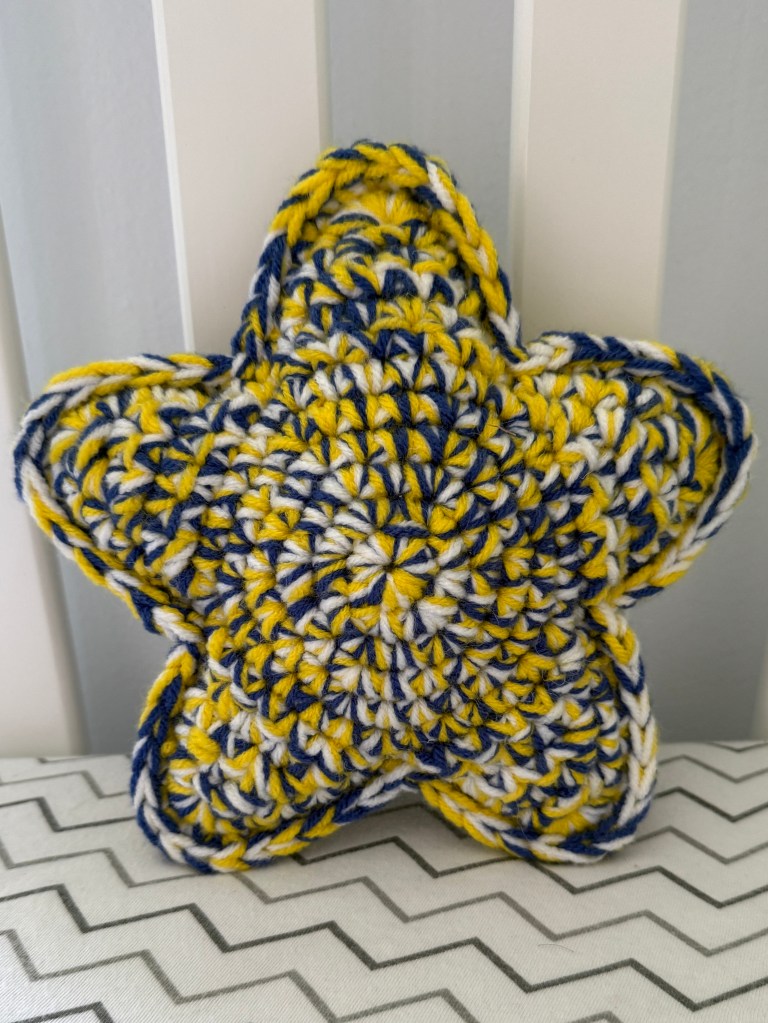
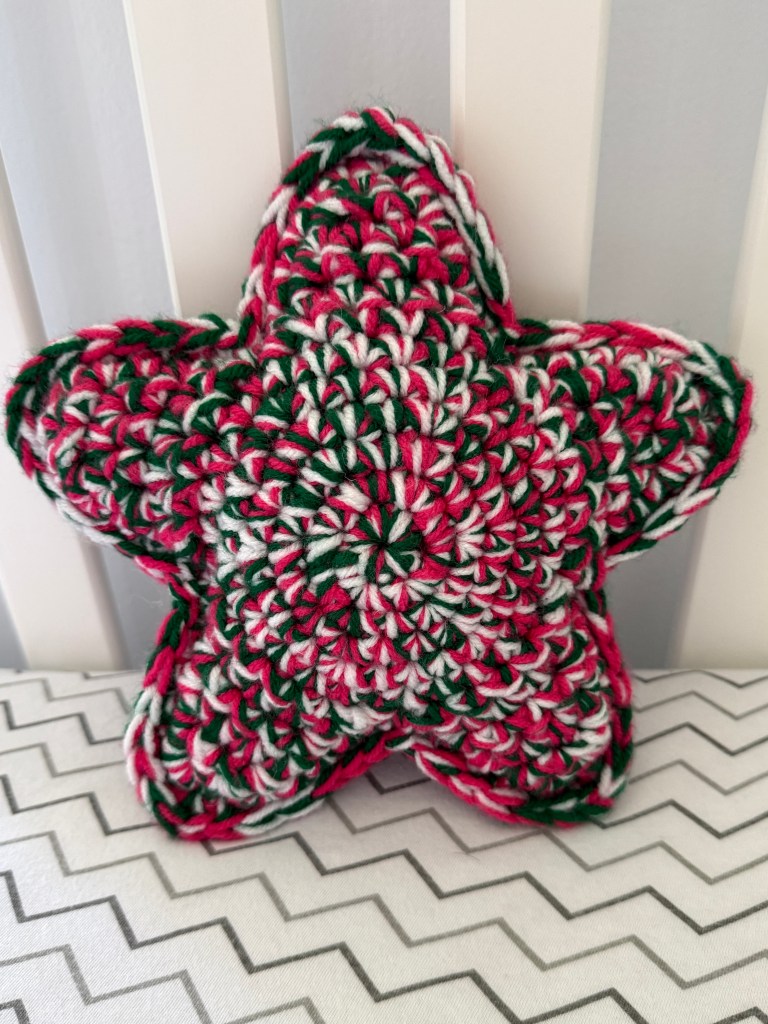
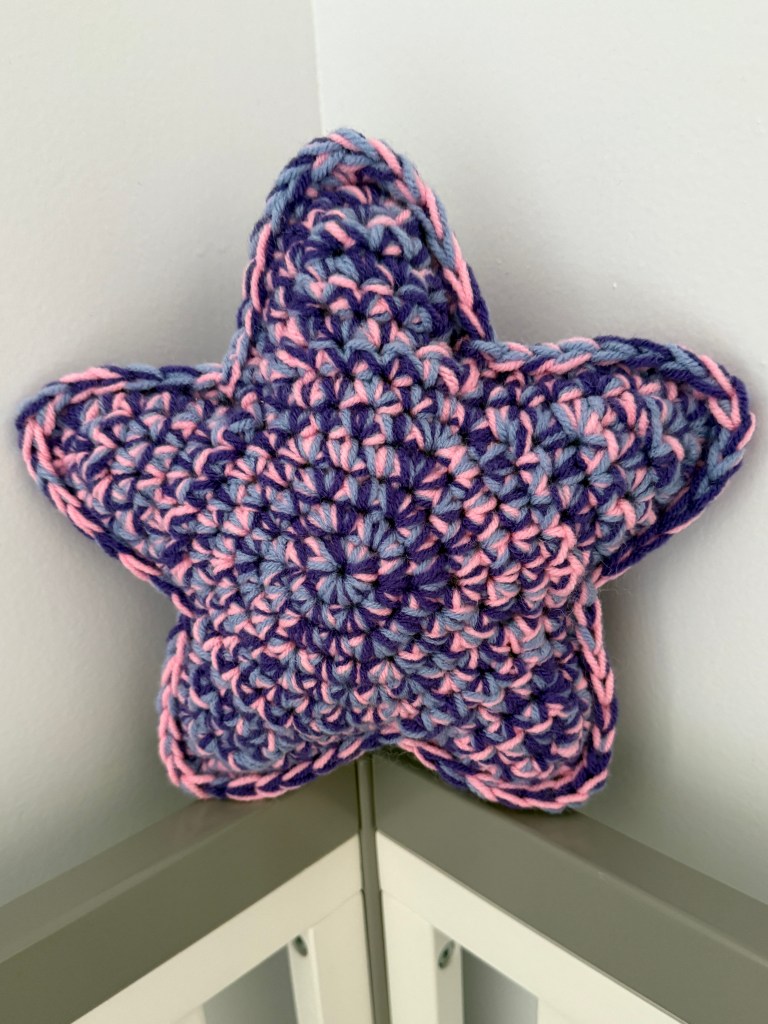
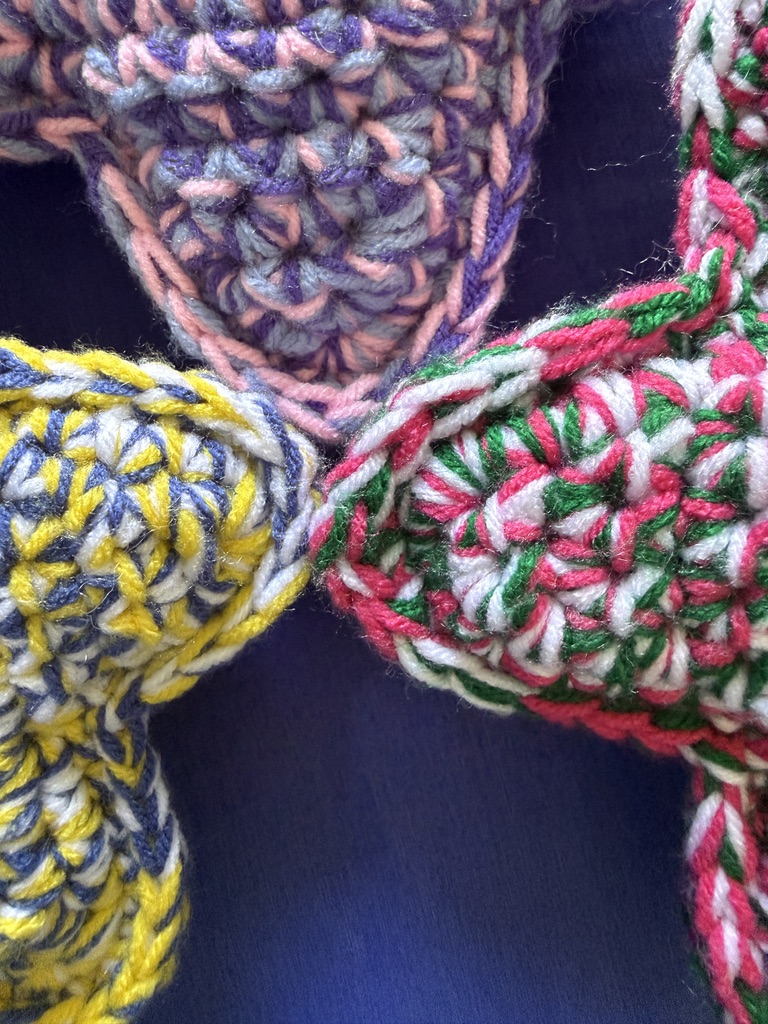
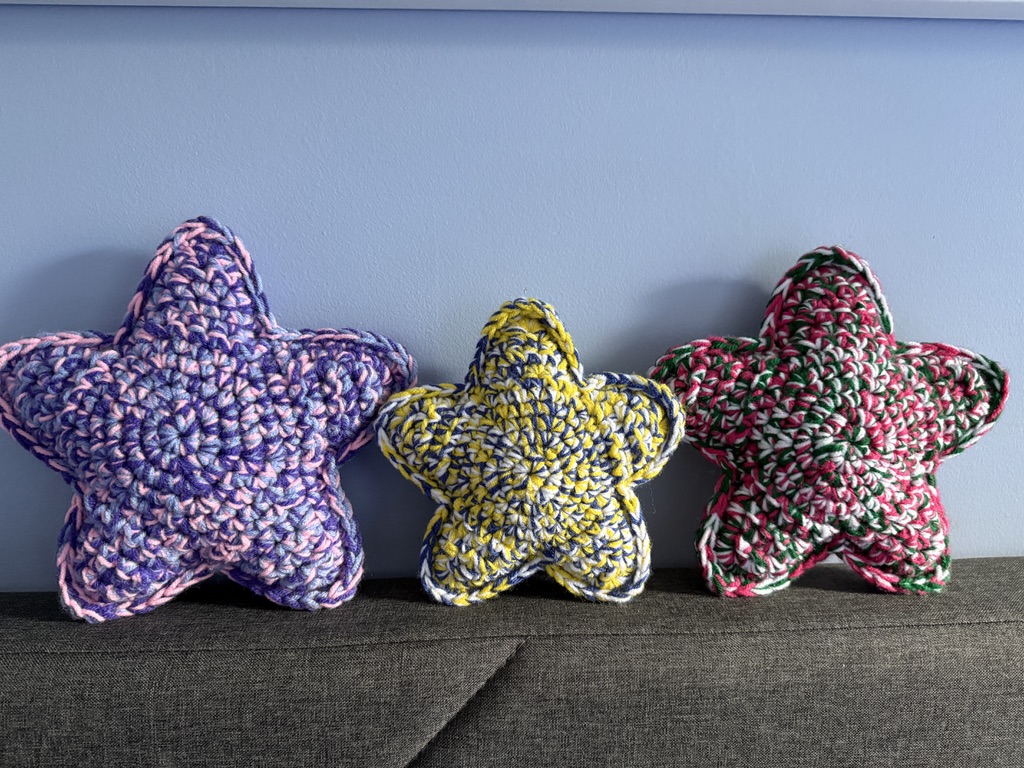
👋 Welcome to the free written pattern for my original Marbled Star! We are creating a beautiful, color-mixed effect using a technique called yarn marling, which means we will be holding three strands of yarn together at the same time. The way the colors blend together is completely unique every single time, meaning no two stars will ever look exactly alike. It is so much fun to experiment with different color palettes and yarn pairings to see what happens! As a bonus, this technique makes it the ultimate stash-busting project, perfect for using up those random colors in your yarn stash that you aren’t quite sure what to do with. And you end up with a squishy soft and totally one-of-a-kind amigurumi plushie! 🌈 ⭐️
Watch the full walkthrough video above for a complete, real-time tutorial. I intentionally left everything in (mistakes and all!) so you can crochet right along with me and see exactly how to navigate the trickier parts of the construction.
🎨 Endless Possibilities: Make it Yours
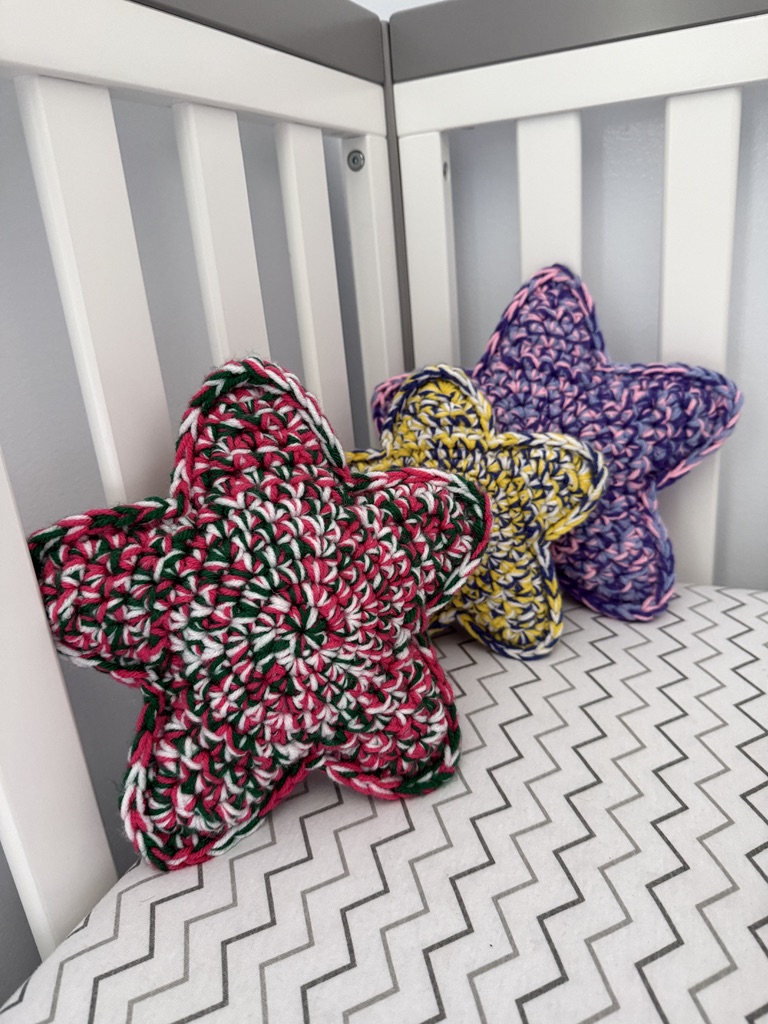
One of my favorite things about this pattern is how easily it can be customized. Because you’re mixing three strands, the color combinations are infinite! Here are a few ways you can personalize your Marbled Star:
- Custom Room Decor: Choose shades that match a nursery theme, a kid’s playroom, or even your own living room as a fun accent piece.
- Team Spirit & School Colors: Hold three strands of the same color or mix the team’s colors for the ultimate gift for sports fans or recent graduates! 🎓
- Personalized Gifts: Crochet a star in a friend’s favorite color palette for a thoughtful, handmade birthday or “just because” gift.
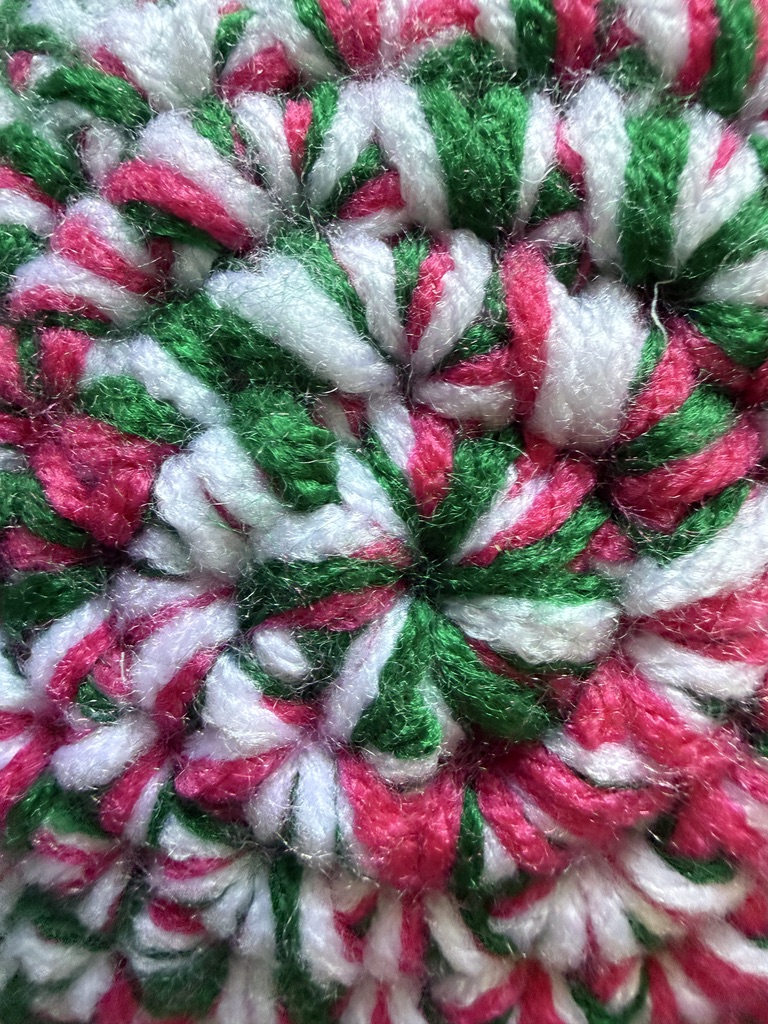
- Holiday Variations: Try red, green, and white for Christmas, spooky orange, purple, and black for Halloween, or pink, red, and white for Valentine’s Day. 💕
Info
Difficulty level: Advanced Beginner. While the stitches themselves are strictly beginner-friendly (just single crochets, increases, and chain & turn), the construction is a bit more involved. We’ll be switching between working in the round and working in rows, crocheting down raw edges to create the border, and managing the tension of three strands of yarn at once. If you know the basics but want to level up your construction skills, this is the perfect project. (Need a refresher? Check out the basic stitch tutorials linked below!)
Size: Approximately 9-10 inches across, depending on yarn choice and tension (when using an 8mm hook).
Materials
Premier Basix worsted weight acrylic yarn*
8.0mm (L) crochet hook
Poly-Fil stuffing
Stitch marker (to mark the end of continuous rounds and our star points)
Tapestry needle
Scissors
Abbreviations
ch = chain
sc = single crochet
inc = increase (crochet 2 stitches into the same stitch)
sk = skip
sl st = slip stitch
st = stitch
RS = Right Side
WS = Wrong Side
[ ] x# = repeat the sequence inside the brackets the specified number of times
( ) = total stitch count at the end of the round or row
Notes
All stitches are in US terms.
Construction: You will start by working in a continuous spiral in the round for the center base, and then switch to working in rows to create the star points.
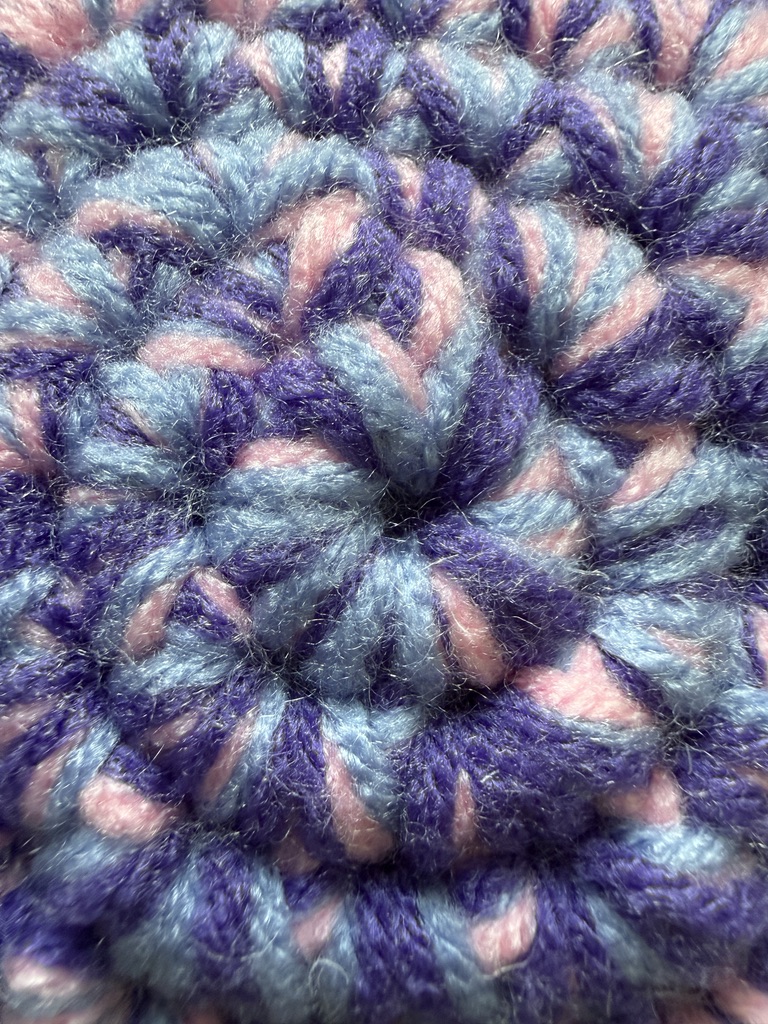
Yarn & Hook Sizes: Because we are holding three strands together, there is no exact science to hook size! I used an 8.0mm hook, but you can easily use a 6.0mm or whatever hook size feels comfortable for you. The goal is just to create a fabric tight enough that the stuffing won’t show through. Feel free to experiment!
Trust the process: Don’t stress if your stitch count gets slightly off when working along the raw edges to create the star’s border. The multi-colored marled yarn is incredibly forgiving. If you need to “fudge” a stitch or two along an edge to make it work, it will not be noticeable at all in the finished piece!
Resources
▶️ Helpful tutorials: Need a refresher on any stitches used in this pattern? Check out these short videos from The Woobles:
- Magic Ring (this is the method I use!)
- Single Crochet
- Increase
- Chain & Turn
🧮 Project tracking: Want to keep track of your rounds as you go? I use Stitch Haven — a site I built to save patterns and organize projects. You can even import the pattern text to instantly generate the steps right next to your built-in row and stitch counters:
Pattern
Star Face (Make 2)
Center Base
Round 1: Magic ring, 6 sc (6)
Round 2: [inc] x6 (12)
Round 3: [1 sc, inc] x6 (18)
Round 4: [2 sc, inc] x6 (24)
Round 5: [3 sc, inc] x6 (30)
Note: Place a stitch marker every 6 stitches around Rnd 5. You should have 5 stitch markers total. These mark the 6-stitch bases for each of your 5 star points.
Star Points (Make 5)
You will now work back and forth in rows to create the first point.
Row 6 (RS): 6 sc, ch 1, turn (6)
Row 7 (WS): Sk 1, 5 sc, ch 1, turn (5)
Row 8 (RS): Sk 1, 4 sc, ch 1, turn (4)
Row 9 (WS): 4 sc, ch 1, turn (4)
Row 10 (RS): Sk 1, 3 sc, ch 1, turn (3)
Row 11 (WS): Sk 1, 2 sc, ch 1, turn (2)
Row 12 (RS): Sk 1, 1 sc (1)
Transition: Work 6 sc evenly back down the raw edge of the point to return to the base of the star.
Next Points: Begin the next point by working the first sc of the next point directly into the next marked stitch on Round 5. Repeat Rows 6-12 and the Transition for each marked section until you have 5 completed points.
Border
Working around the entire star face:
• Sl st into the dip between points, then work 5 sc up the raw edge.
• At the tip of the point (in the 1 sc from Row 12), work 3 sc in the same st.
• Work 6 sc down the previously sc-ed edge of the point.
Repeat these border steps around all 5 points of the star face.
Invisible fasten off and weave in the ends (first star face only).
Repeat all steps to create a second star face.
Assembly
Place both star faces together, ensuring the “right sides” are facing out and aligning the five points.
Using the working yarn still attached to the second face, join the faces by crocheting through both layers completely around the outer edge, starting through the dip between points where you left off on the second face and then into any of the five dips on the first face.
As you work your way around, follow this placement:
• Straight Edges: 1 sc in each stitch going up and down the sides of the points.
• The Peaks: Work 3 sc into the middle stitch of the 3-sc cluster from your border round.
• The Dips: Work 1 sl st in the deep V between the star points to keep the angle sharp.
Pause your joining when you have completed about 3 of the points. Stuff those points and the center firmly with Poly-Fil stuffing.
Continue joining the pieces together, stuffing the remaining points as you go. Ensure all 5 points and the center are firmly stuffed before closing the star completely.
Invisible fasten off and hide the yarn tail securely inside the star.
Finished?
I’d love to see your creations! Tag me @maymayscrochets. (I’m especially interested in seeing how different color palettes come out 🎨) Happy stitching! 🧶
Gallery


Leave a comment